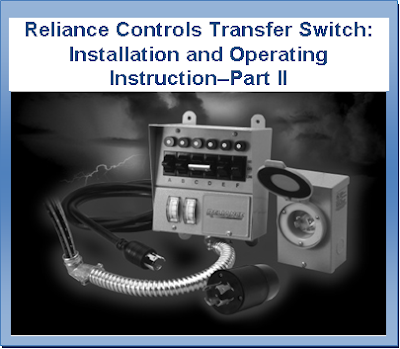
How to Install a Circuit Transfer Switch Kit
A circuit transfer switch kit is an important electrical switch that is used to switch from one power source to another. The alternative power sources can be multiple. One example of an alternative power source is a generator. When the main power source fails, the circuit transfer switch switches from the main power source to the alternative power source. This action can be done automatically or manually, depending on the type of transfer switched installed. Here are instructions on how to install a circuit transfer switch kit.
Tools and Materials
Tools and Materials
- Wire Nuts
- Screwdrivers
- Wire Stripper
- Generator
Step 1 – Choosing a Location
The installation of the transfer switch should be done just next to the main house panel or load center. The switch box must be installed against the wall at a height of about 20 inches above the load center. It is in this location that the switch box will be anchored. Make sure to switch off the circuit breaker before the installation process.
Step 2 – Mounting the Enclosure
Unpack the contents of the kit and read the manufacturer’s manual very carefully. Check if all parts of the kit are present. Take a look at the checklist to double-check. Know that the installation procedures from one product to another may vary, but they do have the same basic installation procedures. Choose the location properly before mounting the enclosure according to the manufacturer’s instructions.
Step 3 – Connecting the Transfer Switch to the House Panel
The manufacturer provides the wiring diagram. Read and study the manual to have an accurate guide on how the wiring is to be installed. Remove the cover on the house panel and locate the knockout. Remove the knockout to allow the wiring from the transfer switch to be inserted into it. In order to avoid mistakes, make sure to connect the same size and type of circuits from the transfer switch to the house panel.
The size of the conductors must be enough to handle the current that passes them. The size and the materials of the conductors, however, should be within the set standards in the local codes. This is to ensure safety.
The cables should all pass the enclosure through the knockouts. Connect the load conductors to the transfer mechanism by following the given wiring diagram. Connect the utility power wires to the circuit breaker, the emergency power wires to the transfer switch terminals, and the load leads to the switch terminals. All wires should be enclosed in a conduit in order to protect them from damage.
Step 4 – Inspecting and Testing
Inspect all connections to check if all are in accordance with the electrical wiring diagram. Check one last time if the installation conforms with rules set in the local codes. Test the switch using a generator to check if it works before allowing it to be electrically operated. If the switch works perfectly, turn on the circuit breaker to finish the installation.
Source: DoItYourself.com®